Learning how to use trekking poles correctly can reduce knee stress by up to 25% and improve hiking stability on challenging terrain. These versatile tools have become essential equipment for hikers across the United States, from Appalachian Trail thru-hikers to casual weekend warriors exploring national parks. This comprehensive guide covers everything from basic grip techniques to advanced terrain strategies, helping you maximize the benefits of trekking poles regardless of your experience level.
Understanding Trekking Poles and Their Purpose
Trekking poles are adjustable hiking aids designed to provide stability, reduce joint impact, and improve balance on varied terrain. Unlike traditional walking sticks, modern trekking poles feature ergonomic grips, adjustable lengths, and specialized tips for different surfaces. In 2026, approximately 68% of regular hikers in the United States use trekking poles, according to outdoor recreation surveys, representing a 15% increase from 2020.
The primary difference between walking poles and trekking poles lies in their design and intended use. Walking poles typically have fixed lengths and simpler grips, designed for urban environments and paved trails. Trekking poles offer adjustable heights, interchangeable baskets, shock absorption systems, and carbide or rubber tips suitable for wilderness hiking. This versatility makes trekking poles superior for varied terrain, elevation changes, and extended backcountry trips throughout American wilderness areas.
Essential Benefits of Using Trekking Poles
Using trekking poles correctly provides measurable physical benefits that enhance hiking performance and reduce injury risk. Research conducted at hiking medicine clinics across the United States demonstrates significant advantages for hikers who master proper pole technique.
Weight Distribution and Joint Protection
Trekking poles redistribute body weight from lower extremities to your upper body, reducing cumulative stress on knees, ankles, and hips. Studies show that proper pole use transfers 5-10 pounds of pressure per step away from leg joints. On a typical 10-mile hike with 2,000 steps per mile, this translates to approximately 100,000 to 200,000 pounds of reduced joint impact. For hikers carrying heavy backpacks on trails like the Pacific Crest Trail or Continental Divide Trail, this reduction becomes even more critical for long-term joint health.
Improved Balance and Stability
Proper trekking pole technique creates four points of contact with the ground instead of two, dramatically improving stability on uneven terrain, stream crossings, and slippery surfaces. This enhanced stability proves particularly valuable on technical trails common in Rocky Mountain, Sierra Nevada, and Cascade Range hiking routes. Hikers using poles report 40% fewer slips and stumbles on wet or rocky terrain, according to 2025 trail safety data from national park services.
Enhanced Cardiovascular Efficiency
Engaging upper body muscles while hiking with trekking poles increases calorie burn by approximately 10-15% compared to hiking without poles. This full-body engagement also improves circulation, particularly beneficial during cold-weather hiking common in northern states during fall and winter months. The rhythmic arm movement helps maintain body temperature and prevents hands from swelling during long descents, a common issue hikers face on steep trails like those in the White Mountains or Adirondacks.
How to Properly Adjust Trekking Pole Height
Correct pole adjustment forms the foundation of effective trekking pole use for beginners and experienced hikers alike. Standing upright on flat ground, hold the pole with the tip touching the surface near your foot. Your elbow should form a 90-degree angle when gripping the handle. For most adults, this translates to pole lengths between 100-135 centimeters, depending on height.
For uphill hiking, shorten poles by 5-10 centimeters to maintain the proper arm angle as terrain slopes upward. Conversely, when descending, lengthen poles by 5-10 centimeters to provide adequate reach and support. Many experienced hikers on variable terrain trails in states like Colorado, Washington, and Vermont adjust their poles multiple times during a single hike. Modern quick-lock mechanisms make these adjustments possible in seconds without removing your pack.
When hiking on flat ground, maintain the standard 90-degree elbow angle. This neutral position allows for efficient forward momentum while maintaining proper posture. For seniors or individuals with balance concerns, slightly longer poles sometimes provide additional stability, though this should be tested on easy terrain before attempting challenging trails.
Mastering the Proper Grip and Wrist Loop Technique
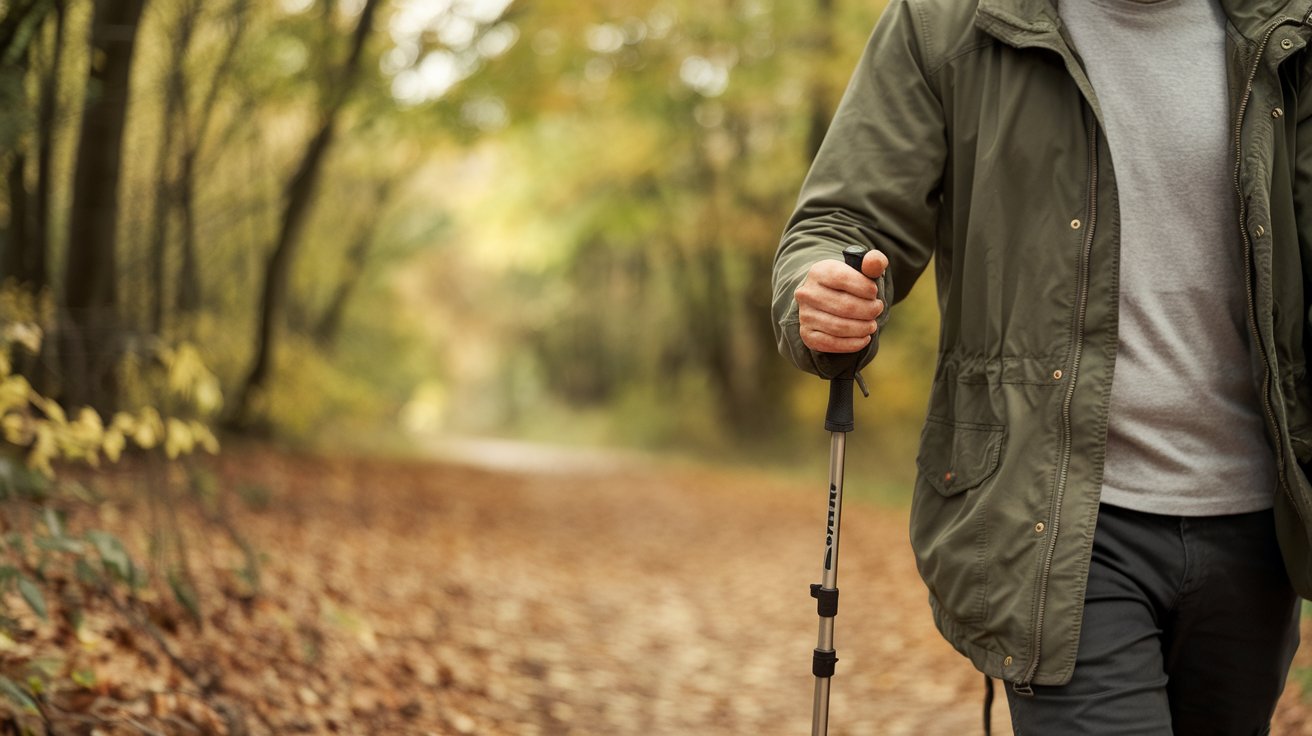
The correct trekking pole grip technique begins with proper wrist loop usage, a detail many beginners overlook. Thread your hand upward through the bottom of the wrist strap, then grip down over the strap and handle together. This configuration allows the strap to support downward pressure, reducing hand fatigue and preventing pole loss if you release your grip temporarily.
Your grip should remain relaxed, not clenched, throughout your hike. White-knuckling the handles creates unnecessary arm tension and fatigue. The wrist straps should bear most of the downward pressure during pole plants, with your hands providing directional control. Adjust strap tightness so your hand rests comfortably without sliding through, yet loose enough to release quickly if the pole catches on rocks or roots.
For walking poles used by beginners, practice the rhythm on flat, easy terrain before attempting technical trails. The natural cadence involves planting the left pole as your right foot steps forward, and vice versa. This opposite-arm, opposite-leg pattern mirrors natural walking mechanics and becomes automatic with practice on local trails or parks.
Trekking Pole Techniques for Different Terrain Types
Adapting your trekking pole technique to match terrain conditions maximizes their effectiveness and safety benefits across diverse American landscapes.
Using Trekking Poles When Climbing Uphill
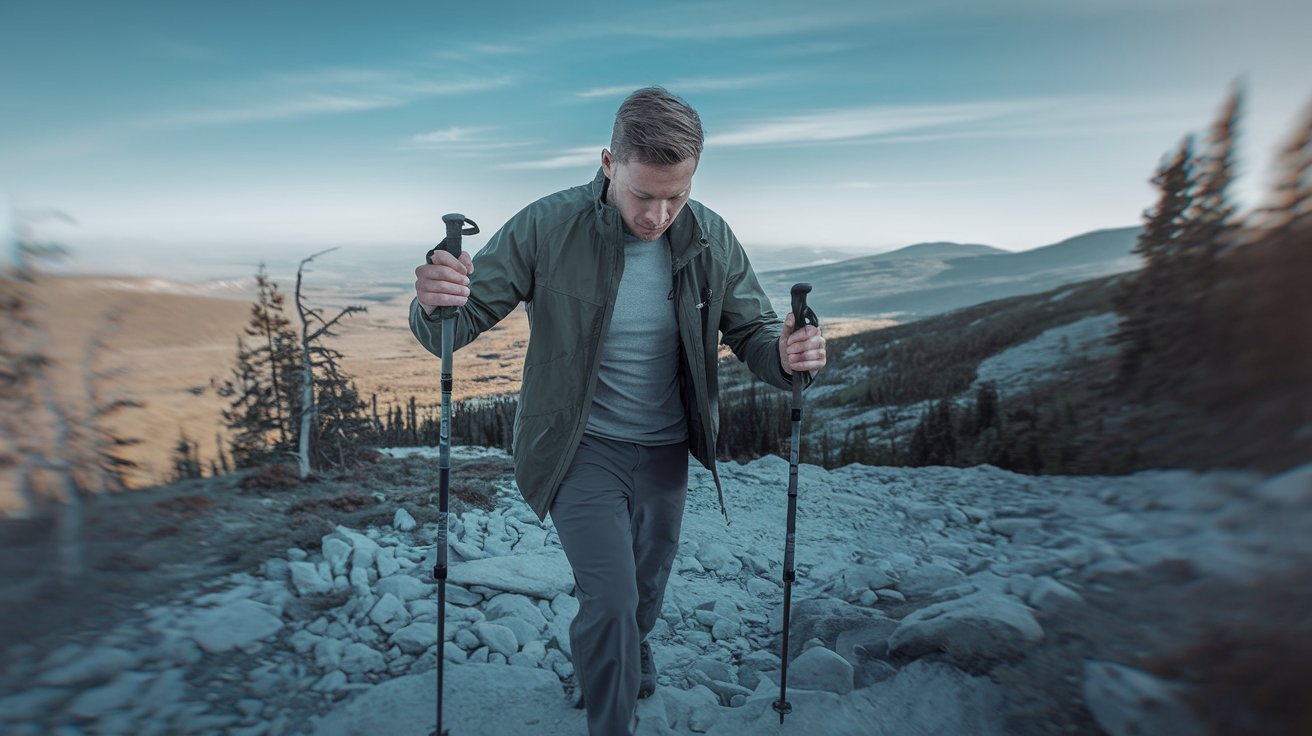
On uphill sections, shorten your poles and plant them firmly before pushing down and slightly back to propel yourself upward. This technique engages arm, shoulder, and core muscles, reducing leg fatigue on sustained climbs. For steep ascents common on trails like Half Dome in Yosemite or Mount Washington in New Hampshire, use a double-pole plant technique: place both poles simultaneously and pull yourself upward using upper body strength. This approach proves especially valuable when carrying heavy packs or when leg muscles tire on extended elevation gains.
Descending Safely with Trekking Poles
Downhill hiking generates significant knee stress, making proper pole technique crucial for joint protection. Lengthen poles by 5-10 centimeters and plant them ahead of your body, allowing them to absorb shock before your foot lands. Studies from sports medicine clinics show that correct downhill pole use reduces knee impact by 25-30%, particularly beneficial for hikers with existing knee pain or arthritis. On extremely steep descents, adopt a wider stance and plant poles outside your normal walking line for maximum stability.
Navigating Stairs and Switchbacks
When encountering stairs on trails, such as those found on popular routes like Angel’s Landing or the Mist Trail, use poles as stabilizing anchors rather than propulsion devices. Plant the pole on the step you’re approaching before stepping up, or on the step you’re leaving when descending. On switchbacks, the outside pole (furthest from the slope) may need to be longer than the inside pole to accommodate the angled terrain. Quick-adjust pole systems make these micro-adjustments practical even on trails with frequent switchbacks.
Stream Crossings and Unstable Surfaces
For stream crossings and boulder fields common throughout mountain regions, trekking poles provide essential stability. Plant poles firmly before committing your weight to each step. On slippery rocks, rubber tips offer better traction than carbide tips. When crossing streams, face slightly upstream and use poles to create a stable triangle of support. Never commit both poles and both feet simultaneously; always maintain at least two points of contact with stable surfaces.
Key Trekking Pole Features and Components
Understanding trekking pole features helps you select appropriate equipment and use it effectively across different hiking conditions throughout the United States.
Pole Tip Materials and Terrain Compatibility
Carbide tips provide superior grip on rock, hard-pack dirt, and ice, making them ideal for technical mountain terrain in regions like the Rockies or Sierra Nevada. These extremely hard tips dig into surfaces but can be slippery on smooth rock or pavement. Rubber tip covers protect carbide points during storage and provide better traction on pavement, wooden bridges, and smooth stone surfaces. Many hikers in the Northeast, where trails frequently cross roads and rocky summits, carry both options and swap as conditions change.
Basket Types for Different Conditions
Trekking pole baskets prevent poles from sinking into soft surfaces like mud, sand, or snow. Standard hiking baskets, typically 2-3 inches in diameter, work well for three-season hiking on established trails. Snow baskets, measuring 4-5 inches across, provide essential flotation for winter hiking and snowshoeing popular in states like Montana, Wyoming, and Maine. Mud baskets fall between these sizes, offering versatility for shoulder-season hiking when trails alternate between frozen and muddy conditions. Most modern poles feature removable baskets that attach via twist-lock or snap mechanisms.
Adjustment Mechanisms and Pole Materials
Adjustable trekking poles use either twist-lock, lever-lock, or folding mechanisms. Lever-lock systems, also called flick-locks, offer the quickest adjustments and work reliably in cold or wet conditions. Twist-locks provide sleeker profiles but may slip under heavy pressure if not properly tightened. Folding poles, popular for ultralight backpacking, collapse to 12-15 inches but offer limited adjustability. Regarding materials, aluminum poles provide durability and cost-effectiveness, while carbon fiber poles reduce weight by 20-30% but cost significantly more and can shatter under extreme side pressure rather than bending like aluminum.
Special Considerations for Different User Groups
Different demographics benefit from adapted trekking pole techniques that address specific physical needs and hiking styles common among American outdoor enthusiasts.
Trekking Pole Use for Seniors
Seniors using trekking poles experience significant improvements in hiking confidence and distance capabilities. For older hikers dealing with balance concerns, slightly longer pole adjustments sometimes provide better stability, though individual testing remains essential. The rhythmic pole planting creates a meditative cadence that helps maintain steady pacing without overexertion. Many senior hiking groups across retirement communities in states like Arizona, Florida, and North Carolina report that trekking poles enable members to continue enjoying trails they might otherwise abandon due to joint pain or balance concerns.
Managing Hip and Knee Pain with Poles
Hikers experiencing hip pain find trekking poles particularly beneficial because they redistribute weight-bearing forces and provide stability that reduces compensatory movement patterns. The four-point contact system decreases the need for hip abductor muscles to maintain balance, reducing strain on hip joints and surrounding muscles. For knee pain sufferers, poles prove invaluable on descents, where they can reduce knee loading by 25% or more. Physical therapists specializing in hiking injuries across the United States increasingly recommend pole training as both preventive medicine and rehabilitation therapy for lower-extremity joint issues.
Trekking Poles for Backpackers
Backpackers carrying heavy loads benefit enormously from proper trekking pole use, as poles help manage the additional weight’s impact on joints and balance. When not in use, most modern backpacks feature loop attachments on shoulder straps or side compression straps specifically designed for pole storage. Some ultralight backpackers use trekking poles as tent supports, choosing shelters designed around this dual-purpose functionality to eliminate dedicated tent poles and reduce pack weight. This approach has become standard among Pacific Crest Trail and Appalachian Trail thru-hikers seeking to minimize base pack weight.
Common Trekking Pole Mistakes to Avoid
Even experienced hikers sometimes develop ineffective trekking pole habits that reduce benefits or create new problems. Recognizing these errors helps you maximize pole effectiveness.
The most common mistake involves setting pole height incorrectly and never adjusting it for terrain changes. Maintaining the same length on steep uphills forces awkward arm positions and reduces propulsion efficiency. Similarly, failing to lengthen poles for descents increases knee impact rather than reducing it. Another frequent error involves death-gripping the handles, which creates arm and shoulder fatigue. The wrist straps should bear most pressure, with hands maintaining only light directional control.
Many beginners also plant poles too close to their body, which provides minimal stability benefit. Proper technique involves planting poles slightly ahead and outside your natural stride line. Forgetting to tighten adjustment locks before hiking leads to poles collapsing under pressure at critical moments. Always verify locks are secure before starting your hike and periodically check them, especially after rest breaks when temperature changes might affect mechanism tightness.
Maintaining and Caring for Your Trekking Poles
Proper trekking pole maintenance extends equipment lifespan and ensures reliable performance on trails throughout the United States. After each hike, especially in muddy or sandy conditions, rinse poles with clean water and wipe them dry before storage. Pay particular attention to adjustment mechanisms, where dirt and grit accumulate and cause premature wear or slipping.
Periodically disassemble adjustable sections and clean internal surfaces, applying a light coating of silicone spray to prevent corrosion and ensure smooth operation. Check that locking mechanisms engage fully and hold firm under pressure. Replace worn rubber tips before they expose carbide points, which can damage floors and are slippery on rock surfaces. For poles with anti-shock systems, these mechanisms eventually wear out and may need professional servicing or replacement after 500-1000 miles of use.
Store poles in a cool, dry location with adjustment locks slightly loosened to prevent spring tension fatigue. Avoid leaving poles in hot vehicles, as extreme temperatures can warp components or damage grip materials. Before major hiking trips, inspect all components carefully, testing locks under body weight pressure to ensure they won’t fail on challenging terrain far from trailheads.
When to Use Trekking Poles and When to Leave Them Behind
While trekking poles offer substantial benefits, certain situations warrant leaving them behind or stowing them temporarily. Technical scrambling routes requiring hand use for climbing make poles cumbersome rather than helpful. Popular routes like the Cables on Half Dome or the final approach to Longs Peak require hands for chains, cables, or rock holds where poles would be dangerous obstacles.
Dense forest trails with frequent blowdowns and brush require constant maneuvering around obstacles, making poles more hindrance than help. Similarly, very crowded trails during peak season on popular routes like the Appalachian Trail near shelters or the John Muir Trail during summer may involve so much stopping, starting, and passing that poles become awkward to manage.
However, for the majority of hiking situations across American trails—from desert paths in the Southwest to mountain routes in the West to forested trails in the East—properly used trekking poles enhance safety and comfort. They prove particularly valuable for anyone carrying overnight packs, hiking with knee or hip concerns, or tackling trails with significant elevation change. As your technique improves through practice, poles become natural extensions of your body that you barely notice until you hike without them.
Related video about how to use trekking poles
This video complements the article information with a practical visual demonstration.
Frequently Asked Questions
How do you use trekking poles for beginners?
Beginners should start by adjusting poles so elbows form 90-degree angles when holding poles with tips on flat ground. Thread hands up through wrist straps from below, then grip down over both strap and handle. Practice on flat, easy terrain using an opposite-arm, opposite-leg rhythm: plant left pole as right foot steps forward. Keep grip relaxed, letting wrist straps bear most downward pressure. Start with short hikes to build muscle memory and confidence before attempting technical terrain or long distances.
Do trekking poles help with knee pain?
Yes, trekking poles significantly help with knee pain by reducing joint impact by 25-30% when used correctly, according to sports medicine research. They prove most beneficial during descents, where poles planted ahead of the body absorb shock before feet land. The weight distribution transfers stress from knees to arms and shoulders, reducing cumulative damage during long hikes. Hikers with existing knee conditions report being able to cover longer distances with less post-hike soreness when using proper pole technique.
Do trekking poles help with hip pain?
Trekking poles provide substantial relief for hip pain by creating four points of ground contact, which reduces the stabilization work required from hip abductor muscles. This decreased muscular demand reduces strain on hip joints and surrounding tissues. The poles also improve overall balance, minimizing compensatory movement patterns that often aggravate hip conditions. Many physical therapists recommend trekking poles for patients with hip arthritis, bursitis, or post-surgical rehabilitation as both preventive and therapeutic tools.
What is the difference between walking poles and trekking poles?
Trekking poles feature adjustable lengths, interchangeable tips and baskets, ergonomic grips with wrist straps, and construction designed for variable wilderness terrain. Walking poles typically have fixed lengths, simpler grips, and are designed for urban environments and paved paths. Trekking poles offer shock absorption systems, carbide tips for rock and ice, and collapsible designs for travel. They handle steep ascents, descents, stream crossings, and rough terrain that would damage basic walking poles designed for gentler, maintained surfaces.
How do you use trekking poles when going uphill?
When climbing uphill, shorten poles by 5-10 centimeters to maintain proper arm angles. Plant poles firmly below and slightly behind your body, then push down and back to propel yourself upward, engaging arm and shoulder muscles to reduce leg fatigue. On very steep climbs, use a double-pole technique: plant both poles simultaneously ahead and pull yourself upward. This transfers significant work to upper body muscles, allowing leg muscles to recover partially during sustained elevation gain.
How do you use trekking poles on stairs or steep descents?
On stairs and steep descents, lengthen poles by 5-10 centimeters and plant them on the step ahead before stepping down, creating a stable brace that reduces knee impact. Use poles as shock absorbers rather than propulsion devices, allowing them to bear significant weight as you descend. On extremely steep terrain, adopt a wider pole stance, planting them outside your normal walking line for maximum stability. This technique can reduce downhill knee stress by up to 30% compared to descending without poles.
| Technique Aspect | Key Details | Primary Benefit |
|---|---|---|
| Proper Height Adjustment | 90-degree elbow angle on flat ground; shorten 5-10cm uphill; lengthen 5-10cm downhill | Optimal biomechanics and energy efficiency |
| Grip Technique | Hand threaded up through wrist strap from below; relaxed grip with strap bearing pressure | Reduced hand fatigue and improved control |
| Downhill Use | Poles lengthened and planted ahead to absorb shock before foot landing | 25-30% reduction in knee impact stress |
| Uphill Technique | Shortened poles planted behind body; push down and back for propulsion | Upper body engagement reduces leg fatigue |
| Flat Ground Rhythm | Opposite-arm, opposite-leg pattern; left pole with right foot forward | Natural gait enhancement and balance |
| Tip and Basket Selection | Carbide for rock/ice; rubber covers for pavement; larger baskets for snow/mud | Optimized traction for terrain conditions |